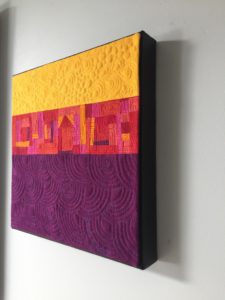
Side view of Sunset Boulevard – Cindy Grisdela
I’ve had so many requests to explain how I mount my small art quilts on painted black canvas that I decided it was time to write a tutorial! There is a step-by-step description of my process in my book, Artful Improv, if you’d like to have it in hard copy.
I started mounting my smaller pieces onto canvas about four years ago as a way to offer more affordable options for visitors to my booth at the art shows and festivals where I sell my work. The canvas background gives the smaller quilts more presence on the wall and they are easy to hang from a wire on the back–no need to worry with sleeves, slats and multiple nails.
There are many different methods to attach quilts to canvas, including stitching, adding a background and wrapping around the canvas, or using velcro, but this is the way I do it and I’ve been happy with the results.
I start with white pre-stretched canvas that I buy from an art supply store. These canvases come in standard sizes, so you need to think ahead when you’re making your quilt about what canvas size it will fit on. My most popular sizes are 8″ x 8″, 12″ x 12″, 10″ x 20″, 16″ x 20″ and 20″ x 20″. They are 1.5″ deep on the edges.
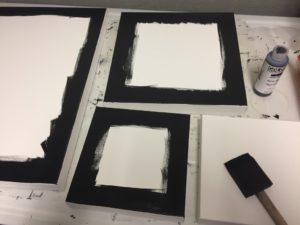
Painting canvas in preparation for mounting quilts – Cindy Grisdela
I haven’t tried attaching pieces to canvas larger than 20″ square because they are difficult to transport, but the process should still work if you want to experiment.
I use black acrylic paint and a foam brush to paint the sides and about 1 – 1.5″ into the top of the canvas. Black works for me because it doesn’t compete with the quilt on the front. I experimented with using different colors in the beginning, and decided that sticking with a consistent black canvas was the best choice.
Create your quilt in the usual way, sandwich it with batting and backing, and quilt it through all three layers.
Trim the finished quilt 1/4″ larger all around than the canvas size. For example, if your quilt is intended to go on a 12″ square canvas, trim the finished piece to 12 1/4″ square. This gives you a very small reveal of the black canvas from the front. I found that trying to make the quilt fit exactly onto the canvas was frustrating–there was always some little piece that stuck out over the edge.
To enclose the edges of your work, cut a piece of black fabric the same size as the quilt. Again, I use black fabric regardless of the color of the quilt, because it will blend in to the black paint on the canvas without distracting from the quilt itself.
With right sides together, stitch all the way around the edges of the quilt using a 1/4″ seam allowance.
Carefully cut a small slit in the black fabric, clip the corners, and turn the work right side out, like a pillowcase.
Press the piece carefully to make a sharp edge.
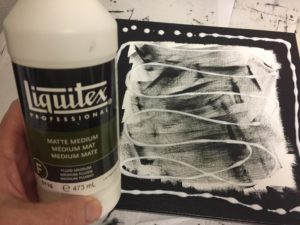
Adding Gel Medium – Cindy Grisdela
I adhere the work to the canvas using gel medium. This idea was recommended to me by a mixed media artist friend in the studio I share with nine other artists. Mixed media artists have been using gel medium to adhere fabric, paper and other media to their canvases for a long time. Because you have an extra layer of fabric (the black facing fabric), the gel sticks to that layer without soaking through to the quilt itself.
Run a thin line of gel medium along the outer edges of the canvas, and then make lazy “S” shapes in the middle of the canvas, as in the photo above. Do be careful to use a thin layer–it will hold the quilt on just fine without soaking through to the quilt.
Center the finished quilt carefully onto the canvas.
Check to make sure there is gel medium on the corners and add another drop if necessary.
Press the quilt gently into the canvas and gently wipe away any gel medium that seeps out along the edges. Gel medium doesn’t dry invisibly, so you don’t want any to show.
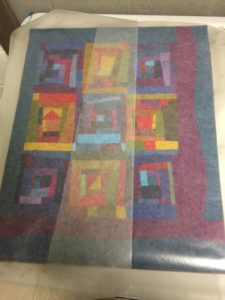
Cover with wax paper and add books to weight it down – Cindy Grisdela
Place a layer of wax paper over the quilt and weight it down with books or a sheet of plywood for a few hours or overnight.
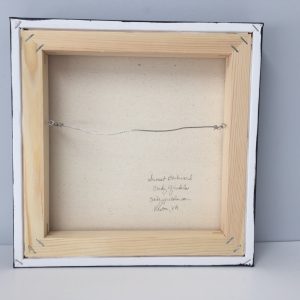
Sign and wire the back – Cindy Grisdela
When the piece is dry, sign the back, attach hooks and wire, and your art quilt is ready to hang on the wall!
This method is meant to be permanent–it is how I want to present my small art to the world.
It is possible to remove the quilt from the canvas without harm, although the facing will have to be replaced. I have had to do this for a variety of reasons, and even after several years, the bond is strong and the quilt is fine.
If for some reason you aren’t comfortable with adhering the gel medium directly to the back of your quilt, another option is to tack your faced quilt to a piece of black felt with hand stitching, and then adhere the felt to the canvas as described above. The felt should be cut just slightly smaller than the finished quilt.
Thanks for reading all the way to the end! I hope this tutorial answers your questions about mounting small quilts to canvas, but feel free to email me at [email protected] if you need more information.