I’ve had a lot of requests for directions for my method of using a facing to finish an art quilt, instead of a traditional binding, so I decided it was time for a tutorial!
I use facings on my quilts because they are meant to be decorative art to hang on the wall, rather than a functional piece for a bed. Bindings are generally used in traditional functional quilts because they provide a double edge on the quilt that will wear longer.
But for a quilt on the wall, the facing option works better for me to present my work as art. Facings are used in dressmaking on the openings of a blouse, for example, to close the edges.
There are a number of other ways to create facings, which you’ll find if you do a Google search, but this is the one that works best for me.
Let’s get started!
First, quilt the quilt, stitching through top, batting, and backing. Trim the edges evenly.
To make a facing for your art quilt, you will make a “frame” for the quilt back out of 2 1/2″ strips. It will fit exactly over the top of the quilt.
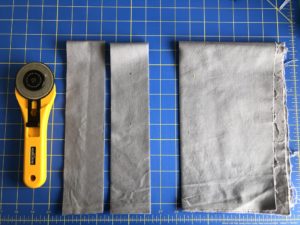
Cut 2 strips 2 1/2″ x the width of two opposite sides of your quilt–I usually start with the top and the bottom. Press under 1/4″ on one long edge. This edge will go towards the inside of the quilt.
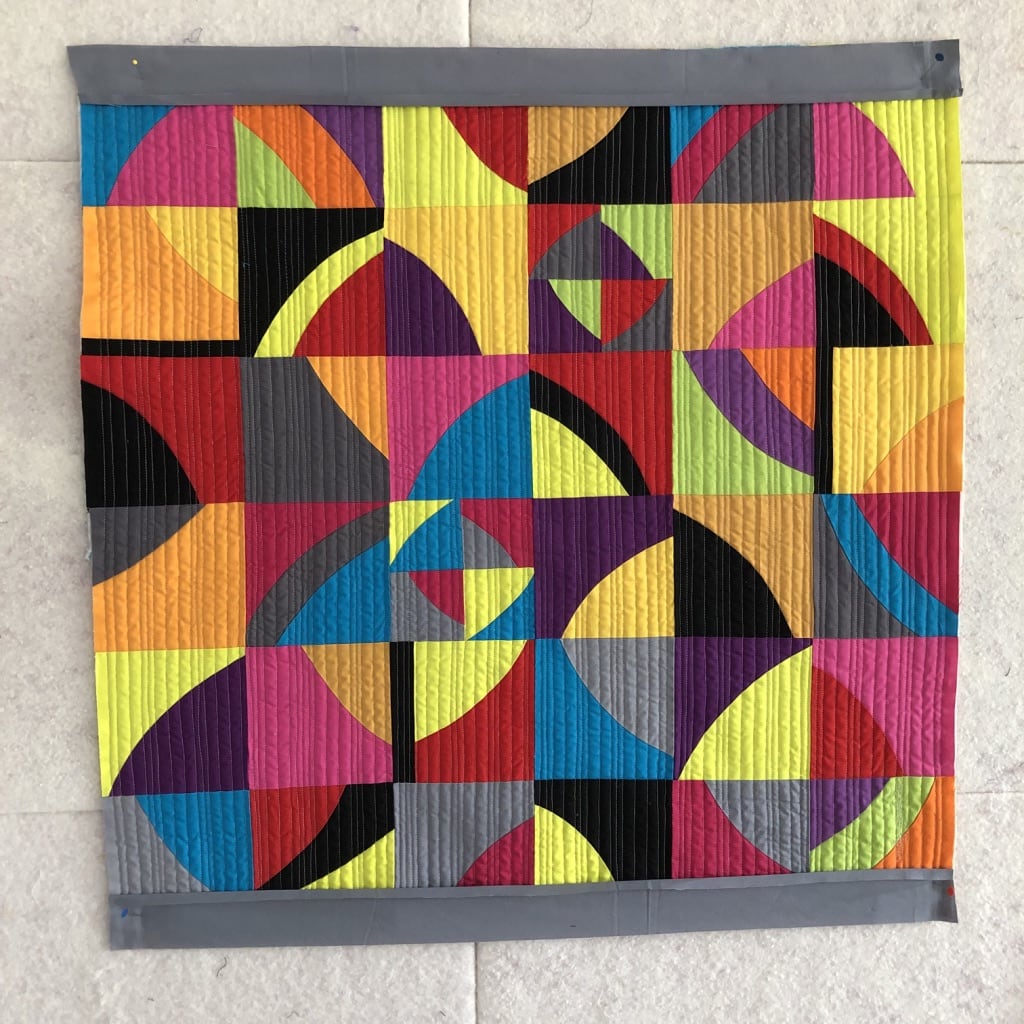
Lay strips on two opposite sides – Cindy Grisdela
Lay strips across two opposite sides of the quilt, right sides together, with raw edges even and the fold on the inside away from the edge. Measure the other two sides from fold to fold, then add 1/2”. I usually do this on my design wall with the quilt pinned up so I can see it, but you can do it on the floor or on a table if that’s easier in your work space.
The ends of these strips should overlap the fold to the raw edges on the first strips. Cut 2 strips this measurement and press under 1/4” on one long edge. Before cutting you may want to lay the strips against the sides of the quilt to make sure they fit properly.

Side facing strip lays over the fold on the top – Cindy Grisdela
Open up the fold on one strip and match the top raw edge of one of the perpendicular strips to the raw edge of the fold. Make sure the long side fold is on the inside and the raw edges match on the sides.
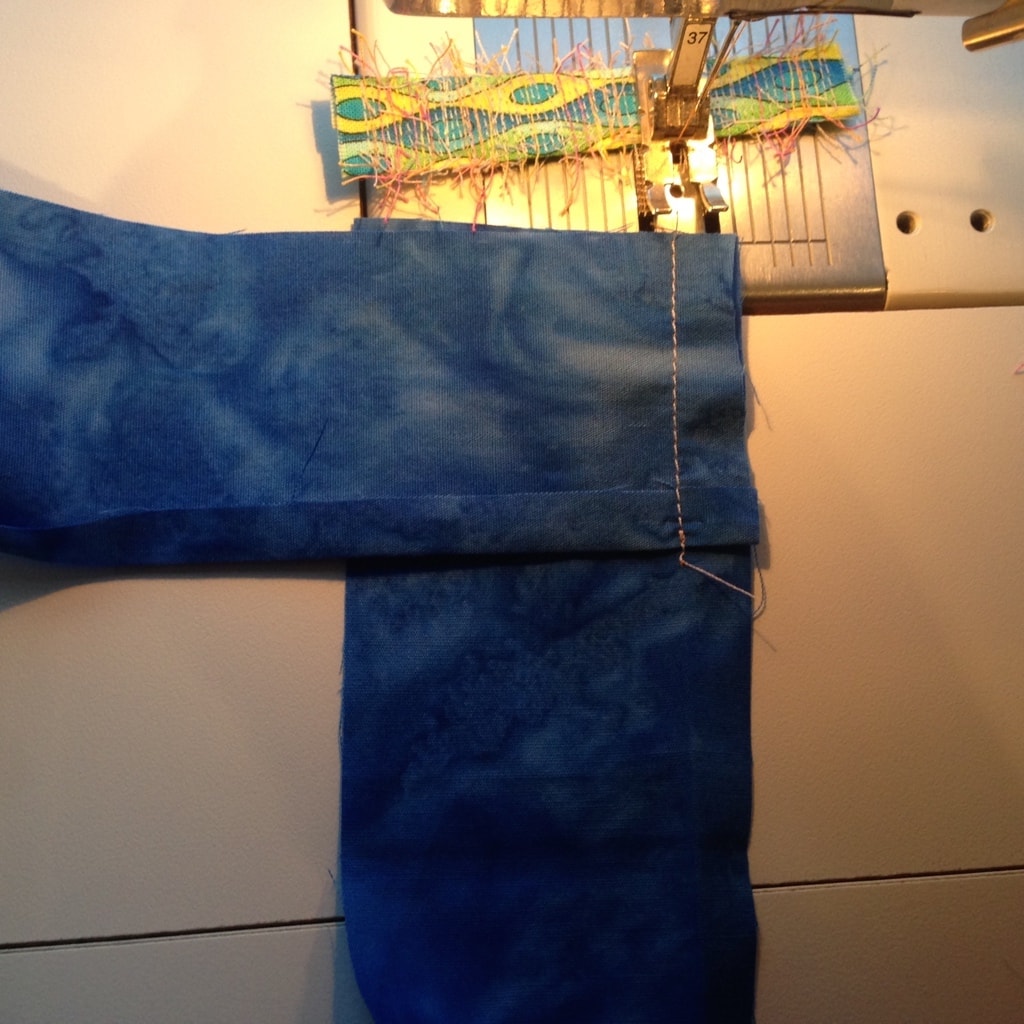
Sewing Facing Corners – right sides together – Cindy Grisdela
With right sides together, stitch along the open fold line just to the width of the perpendicular strip, keeping the other side fold closed. In the photo above, the top facing strip is on the bottom, with the fold open. The side strip is on the top with the fold closed. Press.
Repeat for the other corners, creating your custom frame.
Lay the frame on the quilt, right sides together. Pin and stitch through all layers, with the facing side up. It may help to use a walking foot attachment if you have one. Clip corners.
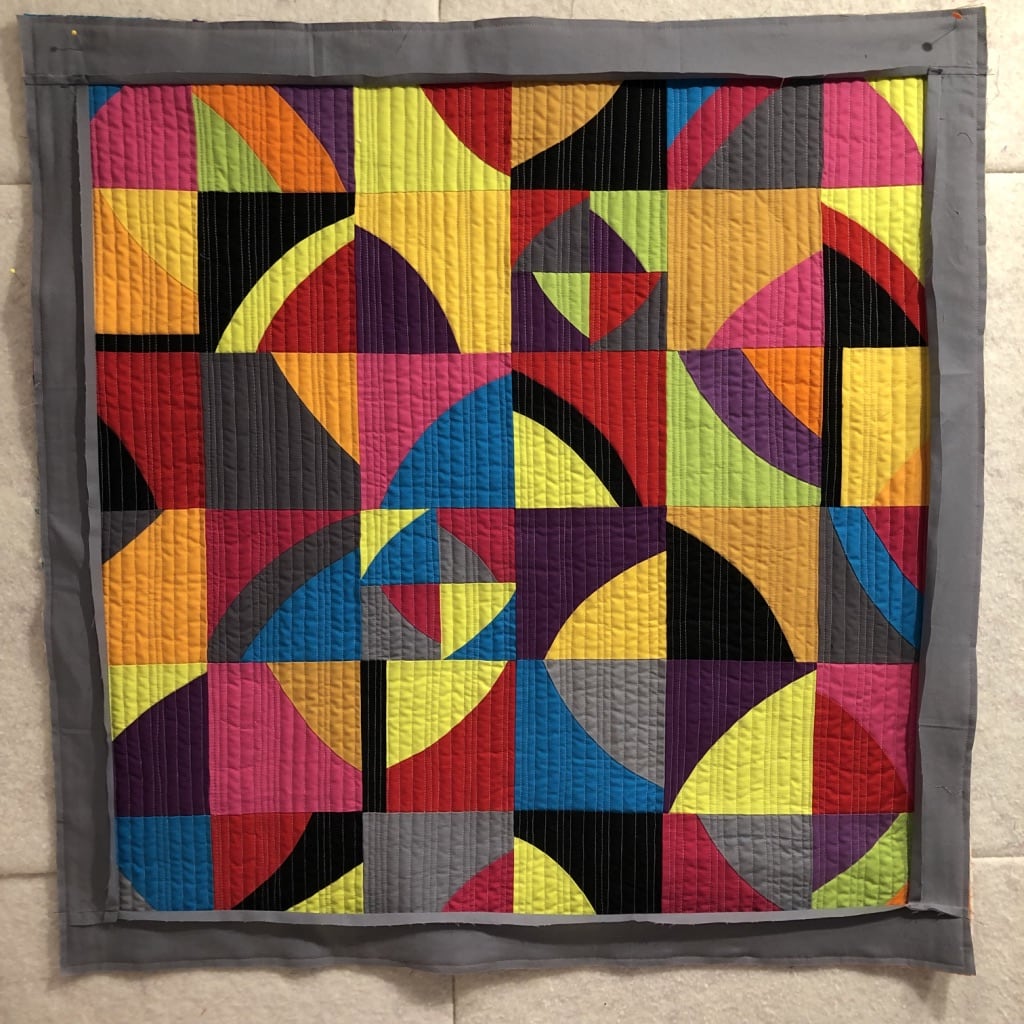
Gray facing “Frame” – Cindy Grisdela
Turn the facing to the back of the quilt. Use a chopstick or other pointed end to carefully push out the corners. Press the facing to the back so the seam lies flat.
Pin facing in place and handstitch the folded edges to the back of the quilt.
Finished quilt with facing pressed to the back and handstitched down – Cindy Grisdela.
This technique works for non-square quilts too. I usually make the facing strips wider in that case and stitch the facing down from the front of the quilt.
Thanks for reading all the way to the end. I hope this is helpful, but if you have questions, feel free to email me at [email protected] and I’ll do my best to answer them.
Love the facing binding look and technique!! thank you for sharing! I have a question… I’m just not grasping the sewing of the 4 facing pieces together. Is the picture showing the example correct? It seems like the short seam should be stitched along the the other intersection (if that makes sense). Is that fabric double sided? Maybe that’s what’s throwing me off.
Susan–I’m glad you found the facing technique helpful. Yes, the picture showing the example is correct–you can stitch it either from fold side or the short side. The fabric is double sided since I use mostly solids. Hope this helps!
Hi Cindy, I am trying this too and I’m exactly where Susan is. I think part of the problem may be that all the strips are the same color and both sides of each strip is the same color so it is hard to follow which are the sides, which are the top pieces and whether you are sewing on the front or back of the fabric. What does fold side mean? It looks to me when I’m looking at my pieces that you want to stitch them together along the inside of the frame, not the outside. I had them pinned to the top of the quilt, and then I took them off and laid them on the back of the quilt to see if it then made more sense to me, but it doesn’t, I still want to join them on the inside of the frame, not the top.
Thanks for your comment, Lucinda–I’m sorry it’s not clear. One long edge of each strip should have a fold along the inside–you will stitch this fold down by hand once the facing is attached. I’ve updated the post with another image that may be clearer. You stitch the short seam right sides together, with the fold on the top edge open on the bottom. The side strip is laid on top, right sides together, with the fold edge closed. The raw edge of the side strip is even with the raw edge of the open fold on the top strip. Stitch just this short seam, then when you open the strip up, the seam will line up with the folded edge to create your frame. I hope this helps! If not, let me know and I’ll try again.